Label
w = Label ( master, option=value, ... )- master: 按钮的父容器。
- options: 可选项,即该按钮的可设置的属性。这些选项可以用键 = 值的形式设置,并以逗号分隔。
(options)属性:
标准选项(部分)
注:下面的内容,其实和Button中的差不多,这里就不做额外讲解。
文本相关
text 设置按钮的文本内容
textvariable 可以修改文本内容的变量
font 文本字体
underline 下划线。默认按钮上的文本都不带下划线。取值就是带下划线的字符串索引,为 0 时,第一个字符带下划线,为 1 时,前两个字符带下划线,以此类推
justify 显示多行文本的时候,设置不同行之间的对齐方式,可选项包括LEFT, RIGHT, CENTER
wraplength 限制按钮每行显示的字符的数量
anchor 锚选项,控制文本的位置,默认为center, 取值: n, ne, e, se, s, sw, w, nw, or center
颜色相关
background(可简写:bg) 按钮的背景色,可以设置white或者#eee格式的颜色
foreground(可简写:fg) 按钮的前景色,也就是文本的颜色
activebackground 当鼠标按下时,按钮的背景色
activeforeground 当鼠标按下时,按钮的前景色,也即是字体颜色
图片相关
image 按钮上要显示的图片,可以使用png和gif图像,不过gif也只是一张图像。图像的加载方法image = PhotoImage(file = filepath)
bitmap 位图,可选的值如下:”error”,”hourglass”,”info”,’questhead’,’question’,’warning’,’gray12’
,’gray25’,’gray50’,’gray75’
边框相关
borderwidth 按钮边框的大小,默认为 2 个像素
padx 按钮在x轴方向上的内边距(padding),是指按钮的内容与按钮边缘的距离
pady 按钮在y轴方向上的内边距(padding)
relief 边框样式,设置控件3D效果,可选的有:flat, groove, raised, ridge, solid, or sunken。默认为 RAISED 。(注:赋值的时候可以使用小写字符串,也可以直接使用大写)
鼠标
cursor
组件特有选项:
width 按钮的宽度,如未设置此项,其大小以适应按钮的内容(文本或图片的大小)
height 按钮的高度
state 设置按钮组件状态,可选的有normal、active、 disabled。默认 narmal。
案例
案例①:普通文本
import tkinter as tk
win = tk.Tk()
win.title("test button")
win.geometry("400x200+200+50")

#背景设置绿色,前景色(即字体颜色)设置白色
label = tk.Label(win,text="这里是Label控件演示",bg = "#50AC40", fg = "white", font=("黑体", 20))
label.pack()
win.mainloop()
效果图: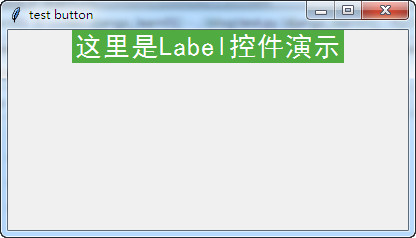
案例②:修改代码文本内容
点击按钮,就可以修改Label的文字内容
import tkinter as tk
win = tk.Tk()
win.geometry("400x200+200+50")

txt = tk.StringVar()
txt.set("这里是Label控件演示")
label = tk.Label(win,textvariable = txt,bg = "#50AC40", fg = "white", font=("黑体", 20)).pack()
def change():
    txt.set("修改过后的文本")
#添加事件处理函数, 设置和间距为10
button = tk.Button(win, text = "修改上面的Label文本内容", command = change,).pack(pady=10) #pady 设置控件的垂直间距
win.mainloop()
结果图: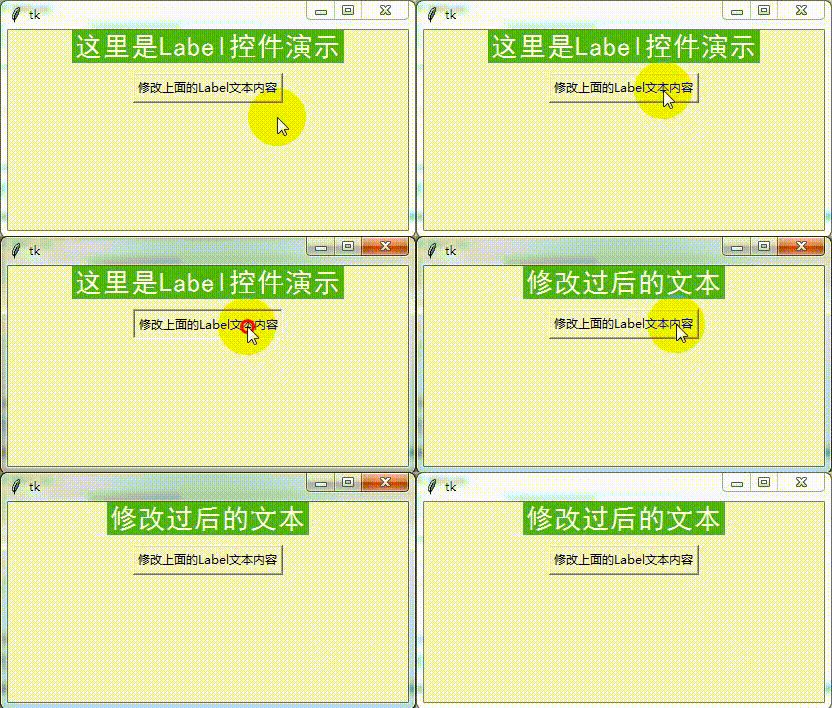
不难发现我们的文本和按钮是默认各占据一行的。这样不利于布局。看看下面的例子:
import tkinter as tk
win = tk.Tk()
win.geometry("400x200+200+50")

txt = tk.StringVar()
txt.set("这里是Label控件演示")
label = tk.Label(win,textvariable = txt,bg = "#50AC40", fg = "white", font=("黑体", 20)).grid(row = 0,column = 0)
def change():
    txt.set("修改过后的文本")
#添加事件处理函数, 设置和间距为10
button = tk.Button(win, text = "修改上面的Label文本内容", command = change,).grid(row = 0,column = 1)
win.mainloop()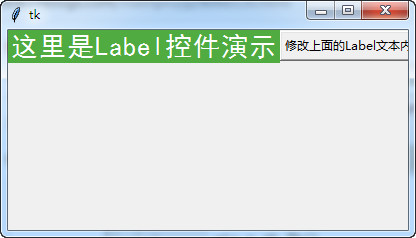
上面使用了grid布局,而不是pack,直接添加到窗口。详细的grid布局,将会在下一章讲解。
下一章:grid布局
案例③:内置位图
from tkinter import *
root = Tk()
li = ["error","hourglass","info",'questhead','question','warning','gray12','gray25','gray50','gray75']
for i in li:
    #compound设置图片在文字的哪边 bottom, center, left, none, right, or top
    Label(root, text = i ,bitmap=i, compound='left').pack()

root.mainloop()
如果不设置compound属性,那么此时图片就会覆盖文字。不显示文字内容。
效果图: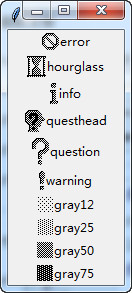
案例④:显示png或gif图片
from tkinter import *

root = Tk()
txt = """At present, only GIF and PPM/PGM
formats are supported, but an interface
exists to allow additional image file
formats to be added easily."""
w2 = Label(root,
           justify=LEFT,
           padx=10,
           text=txt).pack(side="left")
logo = PhotoImage(file="H:/avatar.png")
w1 = Label(root, image=logo).pack(side="right")
root.mainloop()
“justify” 参数指示文字的对齐方向, 可选值为 RIGHT, CENTER, LEFT, 默认为 Center.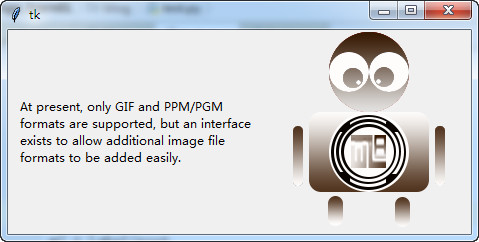
从上面的代码中不难发现,我们使用了两个Label,一个显示文字,一个显示图片。使用side来定位。但是,当使用一个Label的情况又是什么呢?
默认情况下, 如果为一个 Label 控件指定了图片, 那么这个 Label就会只显示图片. 要让图片和文字一同显示, 就要使用 compound 选项. 设置 compound 为 CENTER 将使文字显示在图片上方:
from tkinter import *

root = Tk()
logo = PhotoImage(file="H:/avatar.png")
explanation = """At present, only GIF and PPM/PGM
formats are supported, but an interface
exists to allow additional image file
formats to be added easily."""
w = Label(root,
          compound=RIGHT,
          text=explanation,
          image=logo).pack(side="right")
root.mainloop()
使用了compound属性,指示图片在文字的位置,就可以使用一个Label实现上面的效果:
案例⑤:图片做背景图层
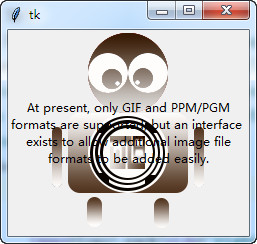
当然了,当compound=center的时候,也就是图片是背景图层,如下:
from tkinter import *

root = Tk()
logo = PhotoImage(file="H:/avatar.png")
explanation = """At present, only GIF and PPM/PGM
formats are supported, but an interface
exists to allow additional image file
formats to be added easily."""
w = Label(root,
          compound=CENTER,
          text=explanation,
          image=logo).pack(side="right")
root.mainloop()